 TEGNEMASKIN

The problem
The small things slip through at the end
At the end of a production you have been through the file so many times that you stop seeing it. A key that landed between two frames, a texture with a path to your own disk, a part that was mirrored with a scale of −1 months ago.
TM Asset Scanner goes through the file and lists what needs a look, right in the viewport. No presets or polygon budgets, just the things you would want to know before the file goes out.
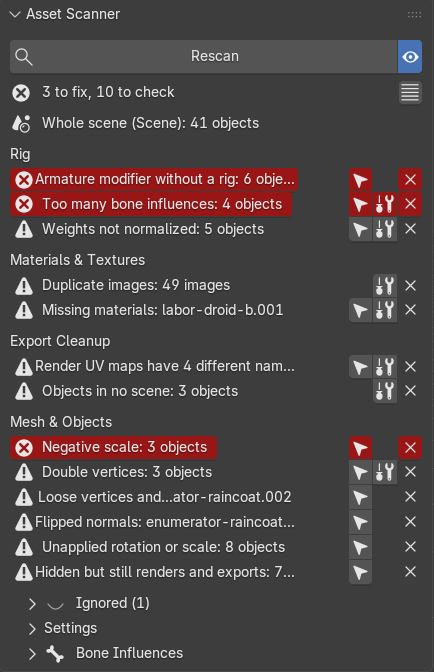
One scan, one list
Every line leads somewhere
Scan checks the whole scene, or only the selection. What needs fixing is red, what is worth a look is yellow, and the rest stays out of the way.
Click a line to see exactly which actions, images or objects it is about. The arrow selects those objects, the wrench opens the TM tool that fixes it, and the cross ignores the check in this file when that's how it's meant to be.
Features
A checklist, not a rulebook
It doesn't grade the asset against a budget. It points out what you would have fixed if you had seen it.
About 40 checks
Animation, rig, materials and textures, export data, and meshes and objects. Each section can be switched off.
A HUD in the viewport
Large, coloured text on a dark panel, so the list is readable while you work. Pick the corner, text size and background.
Only what needs a look
By default the list shows problems and nothing else. When all is fine, it simply says All clear.
Names, not just numbers
With one or two hits the line names them, such as Negative scale: Cube. The header says what was scanned.
Fix with the right tool
Each line knows which TM add-on fixes it, and opens its tab or runs it on the objects in question.
Ignore per file
Weights that don't add up to 1 on purpose? Ignore that check. It's saved in the .blend and can be brought back.
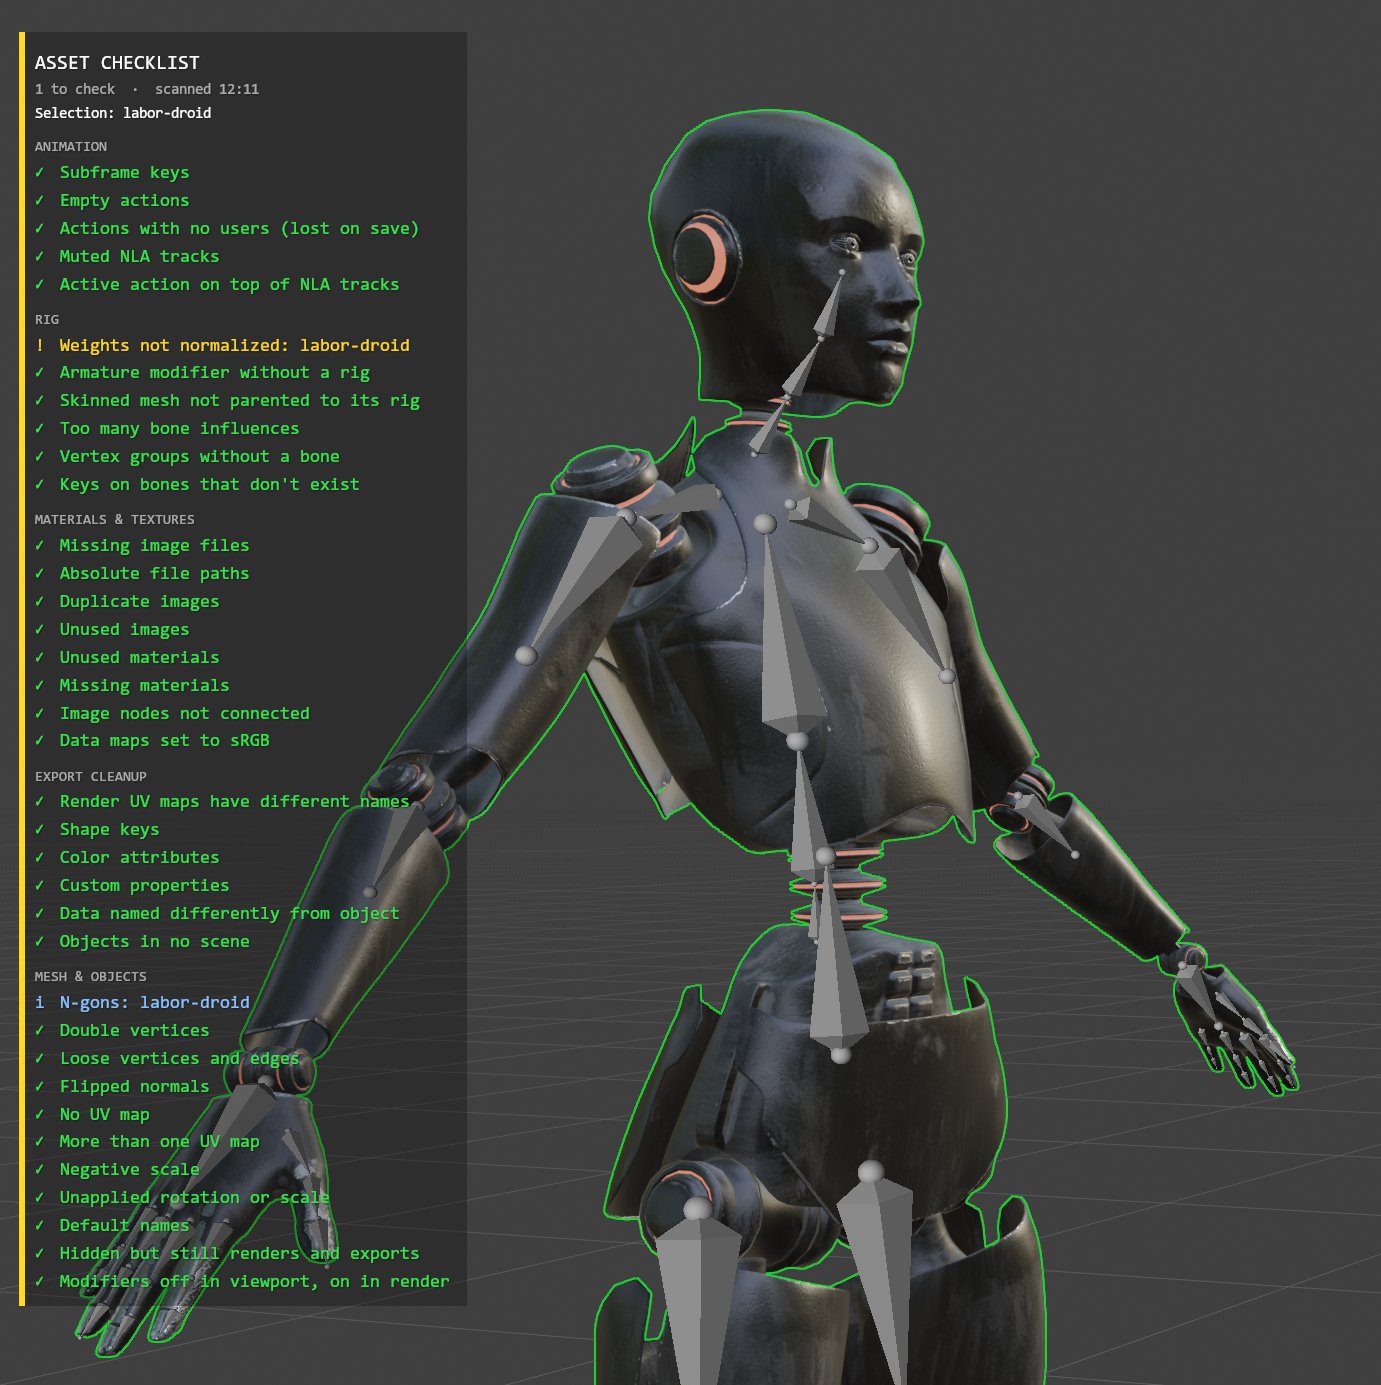
Show All
See what passed, too
Turn on Show All to list every check, also the ones that passed and the lines that are just information. Handy as a last look before you send a file, or as proof that it was checked.
Here only the selected character mesh is scanned: one warning about weights that don't add up to 1, and n-gons noted as information.
Workflow
Four steps
Scan, read, fix, scan again. Most files are clear in a few rounds.
Scan
Click Scan, or the eye to show the checklist in the viewport. Choose the whole scene or the selection.
Read
Start with red. Click a line to see the names and a hint on what to do.
Fix
Select the objects, or let the wrench open the TM add-on that fixes it.
Rescan
Scan again until it's clear, and ignore what's meant to be that way.
Reference
What gets checked
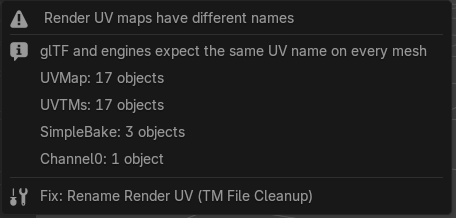
Fixing
Each line knows its tool
The details tell you what was found and which tool fixes it. The wrench opens that add-on's tab in the sidebar, or runs it directly on the objects in the line. A tool you don't have installed is shown greyed out.
Good to know
The details
Scanning changes nothing. The scan only reads the file. Changes happen when you use a fix, and those can be undone.
Scan again after a fix. The list isn't live, so a heavy file doesn't slow down while you work. Fixes that run directly scan again for you.
Some checks cover the whole file. With Selected Objects Only, the object checks look at the selection, while actions, images and materials are always checked across the file.
Ignored checks stay with the file. They are saved in the .blend and listed under Ignored, where one click brings them back.
A long list is cut short. If the HUD doesn't fit the view, it ends with how many more lines are in the panel.
Bone influences included. Select Over Limit marks the vertices with too many bones, and Fix Bone Influences keeps the strongest weights per vertex.
Interested?